


|
|
MenuDescription Server Box Temperature sensors SD Card install Network connection FCALLBOX Software install Remote control install Web Radio config MP3 Player config Digital photos frame config weather forecast config Stock exchange config Phone configuration Temperature sensor Config MAIN configuration User guide Historic and news Home |
FCALLBOX3 Server System
Below the description of the SD card installation (choose a capacity above 4GB if you do not use an external drive) for the Pi Raspberry included into the FCALLBOX Remote Display box. Download the latest Raspbian “wheezy” image here and unzip it. Download the tool « Win32 Disk imager » and flash the image into the SD . Connect a screen and a keyboard to the Raspberry, power on it. At the first power ON, a configuration screen appears (can be launch later with the command : raspi-config) : 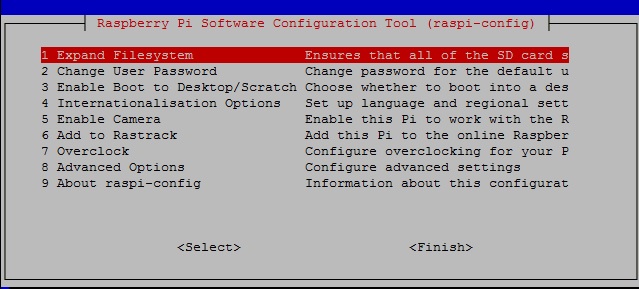
Choose : Expand-rootfs to extend the available disk space to all the SD card Change password (change pass) Enable Boot to Desktop/Scratch then Desktop Login as user 'pi' at the graphical desktop Internationnalisation Options then change TimeZone to get the hour of your location Update the firmware .. by typing :
Get the MAC address, this is important fo the network configuration in the next steps which will follow : Type ifconfig eth0
Note the MAC address after : HWaddr, here b8:27:eb:51:1e:6e
In the case of the FCALLBOX, The SD card see a lot of write operations, according to its quality, we can get corruptions on it which will stop the FCALLBOX. This is the reason why, it is strongly recommended to use the SD car only for the boot and use an HDD for the application. Below the method : connect the USB DRIVE, type sudo fdisk -l and note the "name" of this disk, for eg /dev/sda1 or /dev/sdb1 ... Format the disk : sudo mkfs /dev/sda if your disk is /dev/sda Create 3 partitions one Linux (200G) other swapp (1GB) and one FAT32 (with the remaining space) with sudo cfdisk /dev/sda this is realy well explicated int the French site Framboise 314 here Select New then Primary with 200000 for the first, 2000 for the second, and keep the ramaining space for the thrid Then Type 83 to set the first in Linux partition, Type 82 for the swapp on the second, and 0c for FAT32 for the last Select Write for each disk, then Quit Now, you should see the cfdisk screen like below : 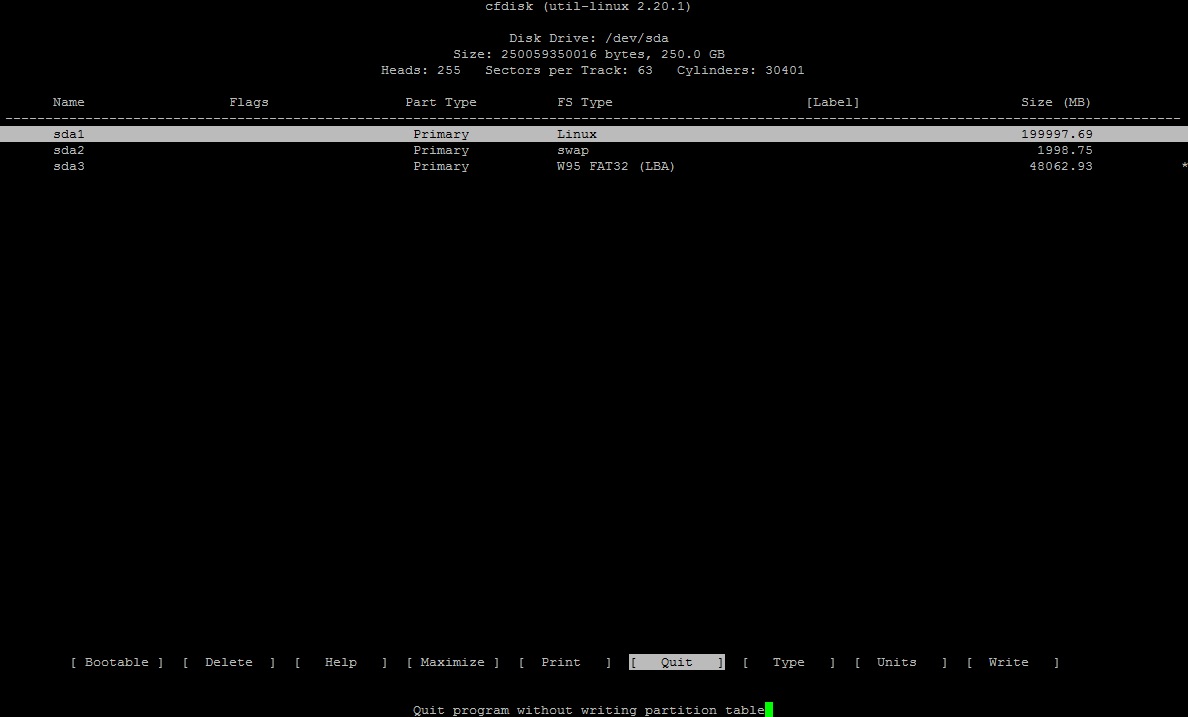
Format the disks :
Copy the content of the SD card on the disk : sudo umount /dev/sda then sudo dd if=/dev/mmcblk0p2 of=/dev/sda1 bs=512 be patient ... Edit the file /boot/cmdline.txt and replace root=/dev/mmcblk0p2 by root=/dev/sda1 Mount the Linux partition : sudo mount -t ext4 /dev/sda1 /media Edit the file /media/etc/fstab comment dev/mmcblk0p2 and add your drive :
Unmount the Linux partition : sudo umount /dev/sda1 Reboot Extend the root file system : sudo resize2fs /dev/sda1
|
|
|
|
|